With Blazor making an entry on the web application scene with its WebAssembly version. I thought it would be good to make a little how-to regarding hosting and deployment.
Since Blazor comes with two different types of hosting models this makes it possible to host your applications using a static web host. The best part of that is that there are many alternatives for good static web hosting that is free. I this post I will focus on host provider Netlify and also on how to build and deploy using Azure Pipelines.
TL;DR; Azure Pipeline file and example can be found at my GitHub zarxor/Blazor.NetlifyDeploy
Creating a site on Netlify
There are a few ways of creating a site on Netlify, you can either go through the creation wizard on the site (this requires the application to have a GIT repo on GitHub, GitLab or BitBucket). Or you can use netlify-cli to manually create an empty site.
To create a site using the netlify-cli you can install the CLI using npm.
1npm install netlify-cli -g
After installing the Netlify CLI you need to login.
1netlify login
This will open up a web browser allowing you to login to you Netlify account. After this you can create a new site.
1netlify sites:create
Choose your team and choose a name, after the command you will be given a url and a Site ID. We will need the site id later.

Creating an API key for Netlify
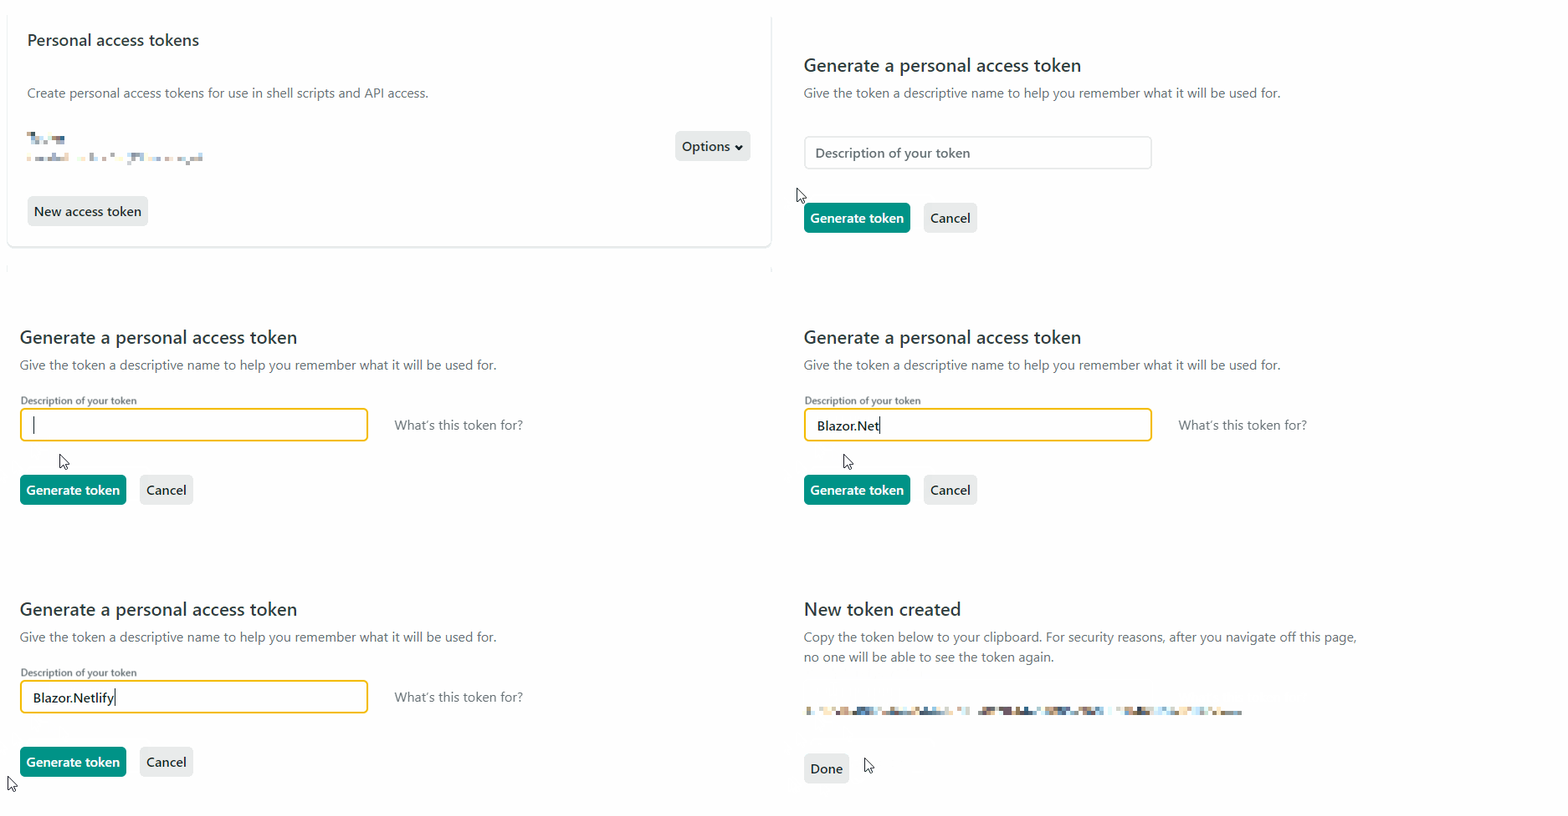
To be able to deploy to Netlify through Azure Pipelines you will need an API key. You can create this by going to User Settings -> Applications -> Personal access tokens (or https://app.netlify.com/user/applications). Then click on New access token, enter a description and then click on Generate token.

Save this token for later!
Setting up your Blazor project
For your Blazor application to be able to play nice with Netlify you need to add a file called _redirects to your wwwroot folder. What this file will do is to redirect all traffic to your Blazor APP.
_redirects
1/* /index.html 200
Creating your Azure DevOps Pipeline
Start by adding your azure-piplines.yml to your project, then setup you regular build steps. Add a variable for an output directory (buildOutput) for your blazor application. This will be used to ensure the output for the Blazor application is the same as the folder being published by netlify-cli.
Next we will need to install the netlify-cli in the build process, for this we will use npm.
Install step
1# Install netlify-cli2- script: npm install netlify-cli3 displayName: 'Install netlify-cli'
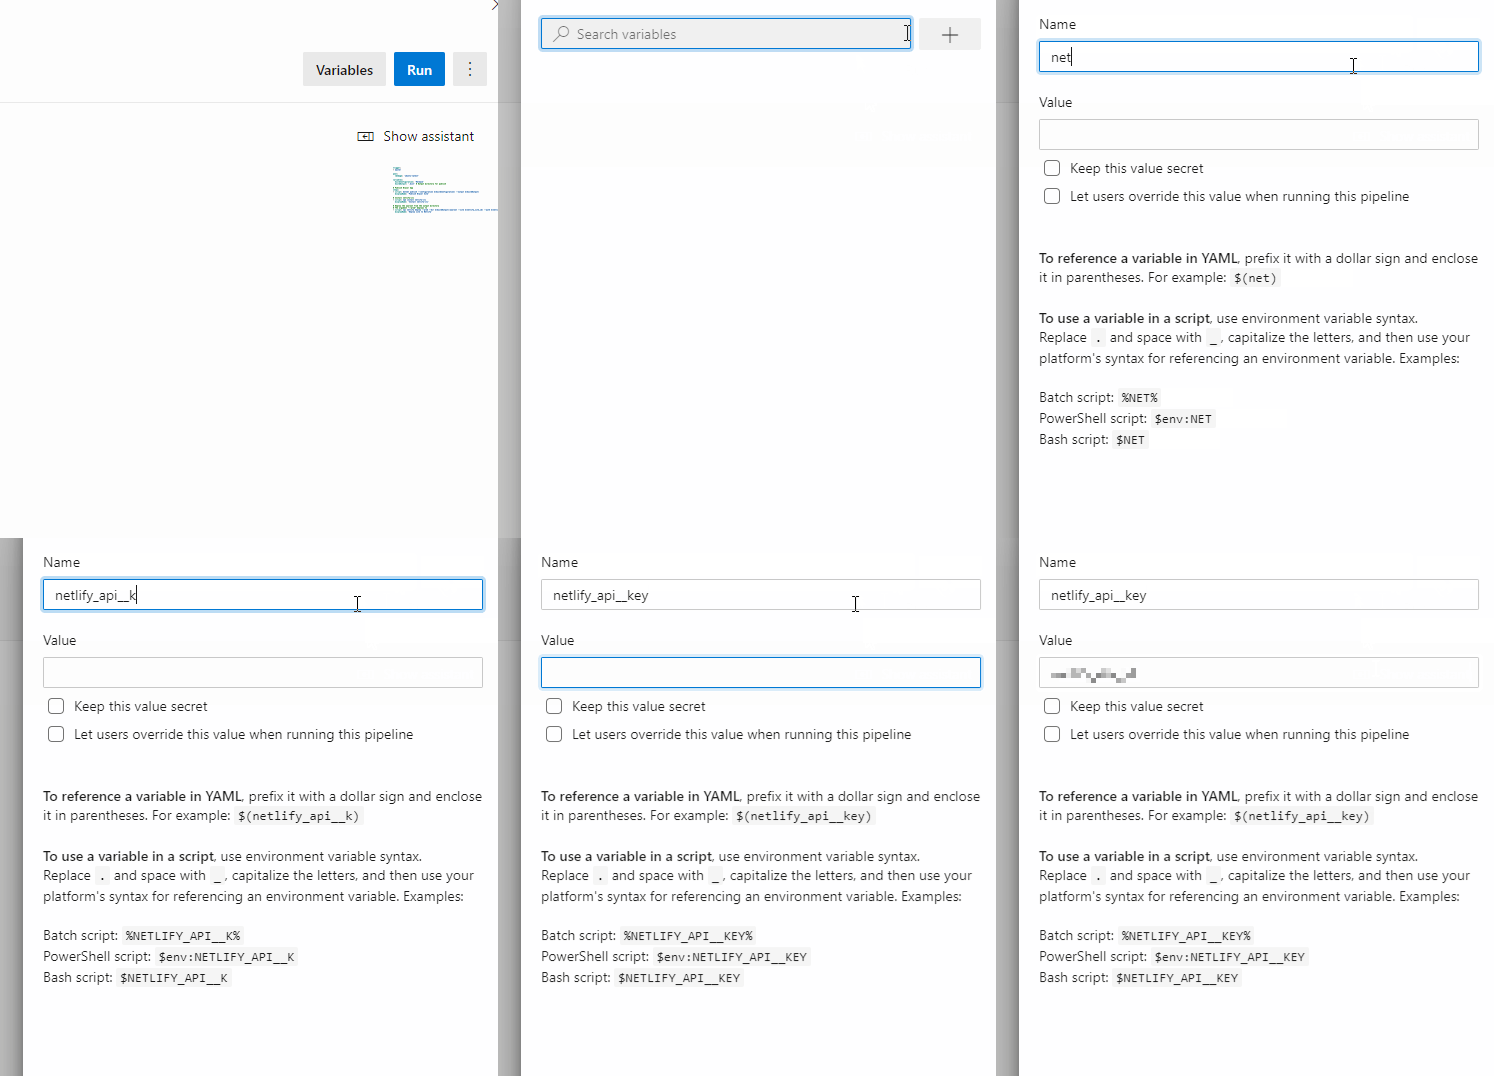
Before deploying we need to setup two variables with the Site Id and Api Key that we created in the step Creating a site on Netlify.

After this we can use the netlify-cli to deploy the site.
Deploy step
1# Deploy the wwwroot from the output directory2# The argument "--prod" deploys to production3- script: npx netlify deploy --prod --dir $(buildOutput)/wwwroot --site $(netlify_site_id) --auth $(netlify_api_key)4 displayName: 'Deploy site to Netlify'
After this your pipeline should be complete and a it should publish and deploy your site to Netlify.
Complete azure-pipelines.yml
1trigger:2- master34pool:5 vmImage: 'ubuntu-latest'67variables:8 buildConfiguration: 'Release'9 buildOutput: '.dist' # Output directory for publish1011# Publish Blazor App12steps:13- script: dotnet publish --configuration $(buildConfiguration) --output $(buildOutput)14 displayName: 'Publish Blazor Site'1516# Install netlify-cli17- script: npm install netlify-cli18 displayName: 'Install netlify-cli'1920# Deploy the wwwroot21# The argument "--prod" deploys to22- script: npx netlify deploy --prod --dir $(buildOutput)/wwwroot --site $(netlify_site_id) --auth $(netlify_api_key)23 displayName: 'Deploy site to Netlify'
All the code
You can find the full code example on github here: https://github.com/zarxor/Blazor.NetlifyDeploy The repo above publishes to this demo site: https://blazor-netlify.netlify.app/
